One advantage that SATA added over previous connection standards is the ability to hot swap devices. This allows users to add and remove devices, such as hard drives and optical drives, without restarting the computer. While it is possible to manage these hot swapped devices in Windows, it doesn’t always work properly and can be a pain. Thankfully, there’s a program out there that takes care of all the heavy lifting for you.
HotSwap! (downloads are near the bottom of the page) makes it incredibly easy to manage all of your SATA drives. After extracting the downloaded file, double click the executable. You’ll notice a new icon appear in the notification area of the task bar.
![]()
By left clicking on the icon you can view all of the SATA devices currently attached to your system. If you want to remove one of the drives, simply left click it in the list. HotSwap! will allow Windows to finish any operations it might still be doing on the drive, spin the drive down, and safely eject it. A popup will notify you when your drive is safe to remove.

Adding new devices is just as easy. Of course, you might be wondering how you can add new SATA devices while the computer is running without opening up the case and plugging a cable directly into an open SATA port (which isn’t recommended, by the way). As you might have guessed, there is a solution.
If your computer supports eSATA, HotSwap! will happily manage any devices plugged into an eSATA port. If you’re on a desktop without eSATA ports, there are enclosures that fit into your computer’s 5.25″ bay. These enclosures plug into an internal SATA port and accept 3.5″ hard drives. If you need to mange 2.5″ hard drives, you can buy an adapter that converts 2.5″ SATA hard drives into the 3.5″ form factor.
[ad name=”sata-gear”]
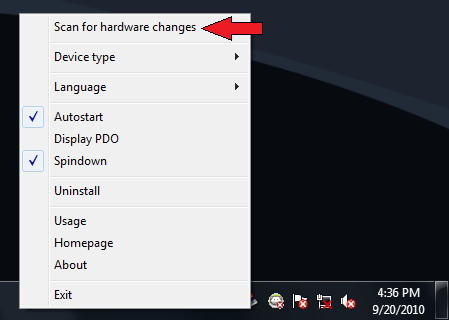
Once you have the device connected, right click on the HotSwap! icon. There are a few options you can adjust in this menu, but the one you’re looking for right now is “Scan for hardware changes.” Windows will then install the necessary drivers and let you view and edit the contents of the drive just like any other storage device. When you’re done, just eject the device as shown previously. That’s it!


Leave a Reply
You must be logged in to post a comment.